
Mouse Shake - A Raspberry Pi Pico and Adafruit Neo Trinkey Project
Apr 19, 2021
In the article, "Raspberry Pi — Expanding My Mind with the GPIO," I describe my discovery of the Raspberry Pi GPIO and my first project using it. While my second project, Mouse Shake, is a small step forward in complexity, I use it daily. It's exciting to make something useful.
This article reviews the Mouse Shaking program and its journey from a Raspberry Pi Pico on a breadboard to an Adafruit Neo Trinkey.
Mouse Shake is Raspberry Pi used as a USB mouse that continuously moves the cursor on a computer screen. It's used to keep my computer from sleeping. One of the computers I use daily is a locked-down Windows PC; I cannot change any of its settings. For security reasons, the PC locks and requires a password after a few minutes of inactivity. In an office environment, this functionality makes sense, but for a remote worker, this is a nuisance. I discussed my frustration with the helpdesk and their recommendation was to run a short video looping all day to prevent the PC from locking. Mouse Shake is a better solution.
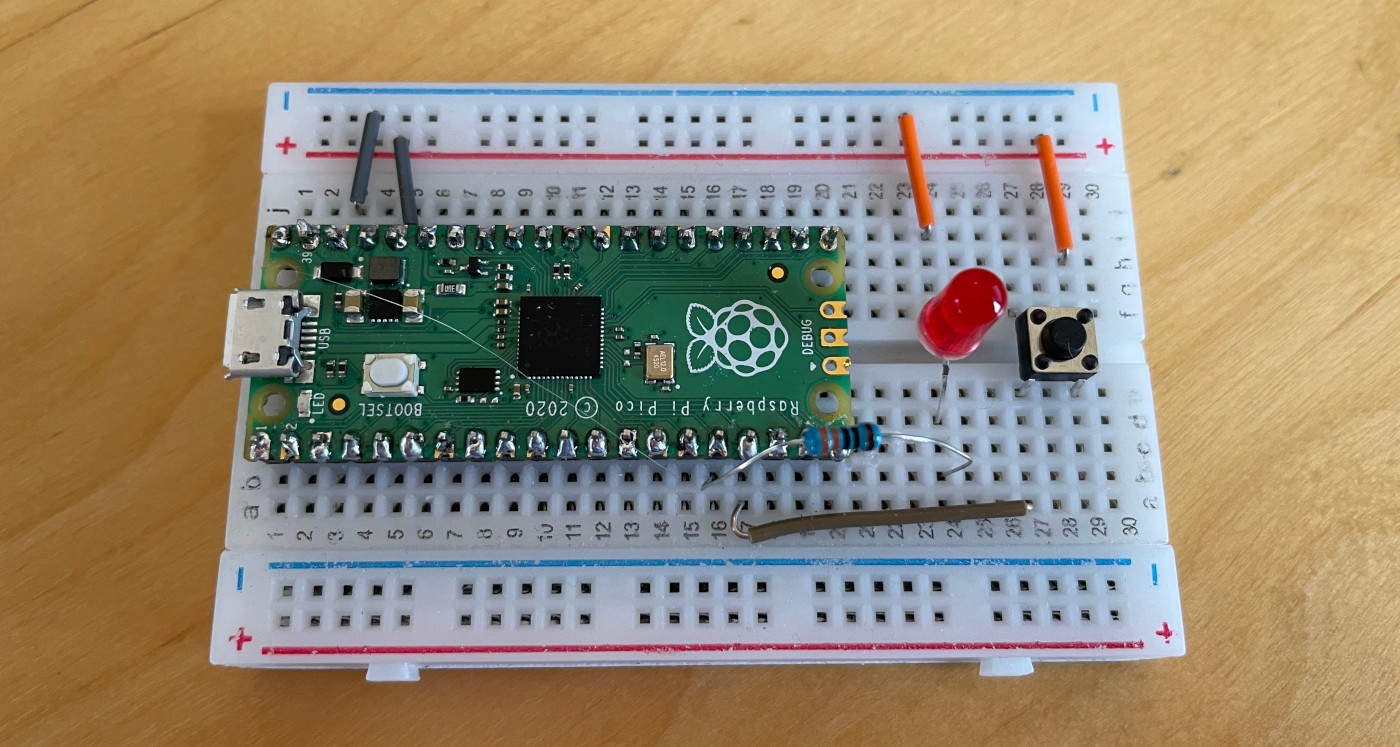
Mouse Shake - Raspberry Pi Pico
The functionality of Mouse Shake is straightforward. Pressing a button will trigger the cursor to move back and forth and illuminate an LED. A second button press will stop cursor movement and turn off the LED. Curson movement will also stop when a time limit is reached.
The idea for Mouse Shake was inspired by a YouTube video from Novaspirit Tech.

Parts:
- Raspberry Pi Pico
- LED
- Switch
- Jumper wires
- 220 ohm resistor
- Micro USB to USB cable
Code Highlights
Mouse Shake is written in CircuitPython. The Mouse Shake code for Raspberry Pi Pico is available on Github.
The button is used to toggle cursor movement on and off. On a button push, the active_state is toggled:
active_state=not active_stateActive State defaults to False. On button press, the value of active_state is set to "not False" which is True. On the next button push, it's set to "not True".
if elapsed >= (max_shake_minutes * 60):
          active_state = False
          active_time = 0
          led.value=False
Cursor Move
When in Active State, the cursor is moved, and the LED is turned on. Curosor movement is on the X access, which is from right to left. The distance moved is controlled by a variable and defaults to 100 pixels. The time delay between each movement is also controlled by a variable and defaults to half-second.
mouse.move(x=move_distance)
time.sleep(mouse_pause)
mouse.move(x=-1 * move_distance)
time.sleep(mouse_pause)
Time Limit
Cursor movement is not indefinite. max_shake_minutes defines how long Active State will last and defaults to four hours (240 minutes). When Active State is turned on, the current time is saved. In each iteration of the main program loop during Active State, the elapsed time is calculated, (current time - start time). If the elapsed time exceeds max_shake_minutes, Active State is turned off.
From Breadboard to Product
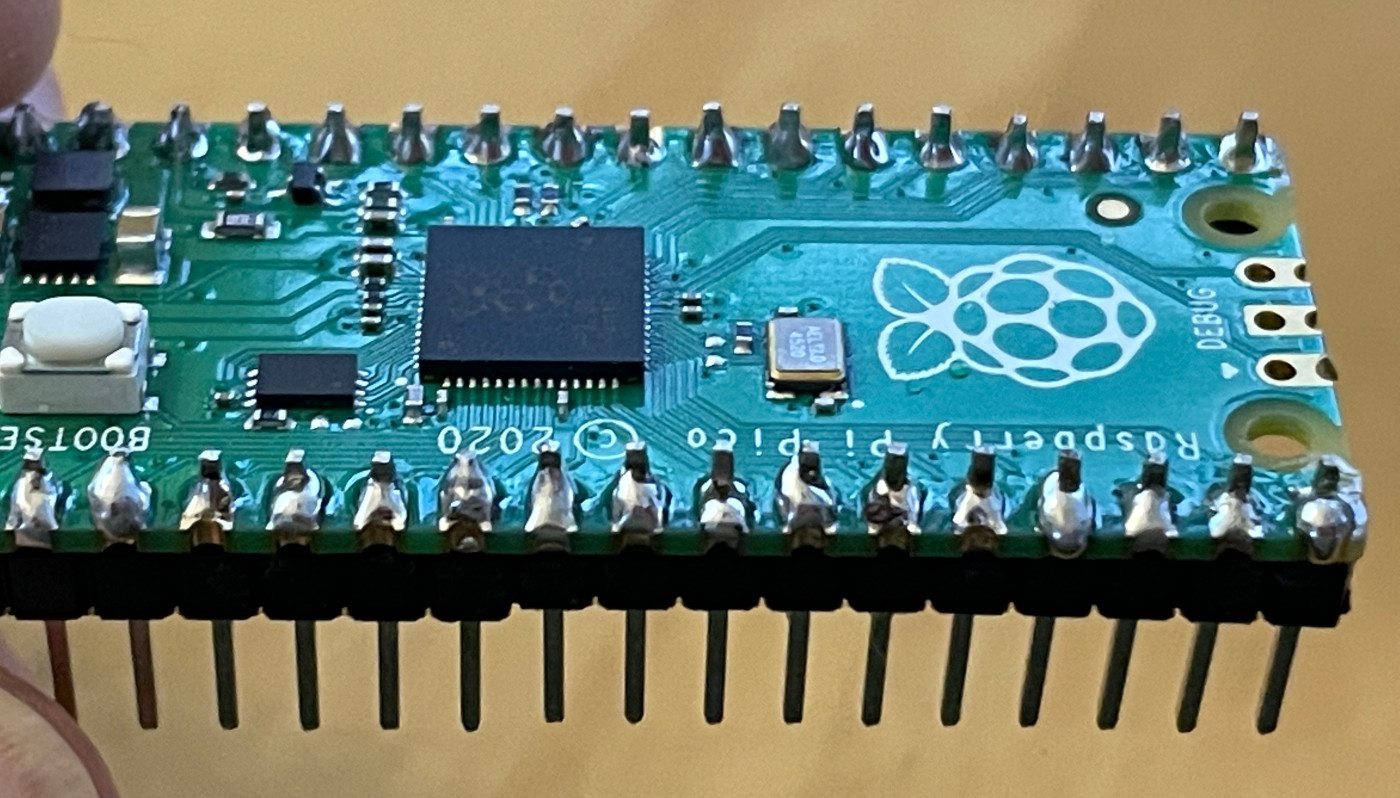
Because I use the Mouse Shake daily, I wanted to progress from a breadboard to a finished project using a case and soldered components. Before this project, my first time soldering was adding pins to the Raspberry Pi Pico.
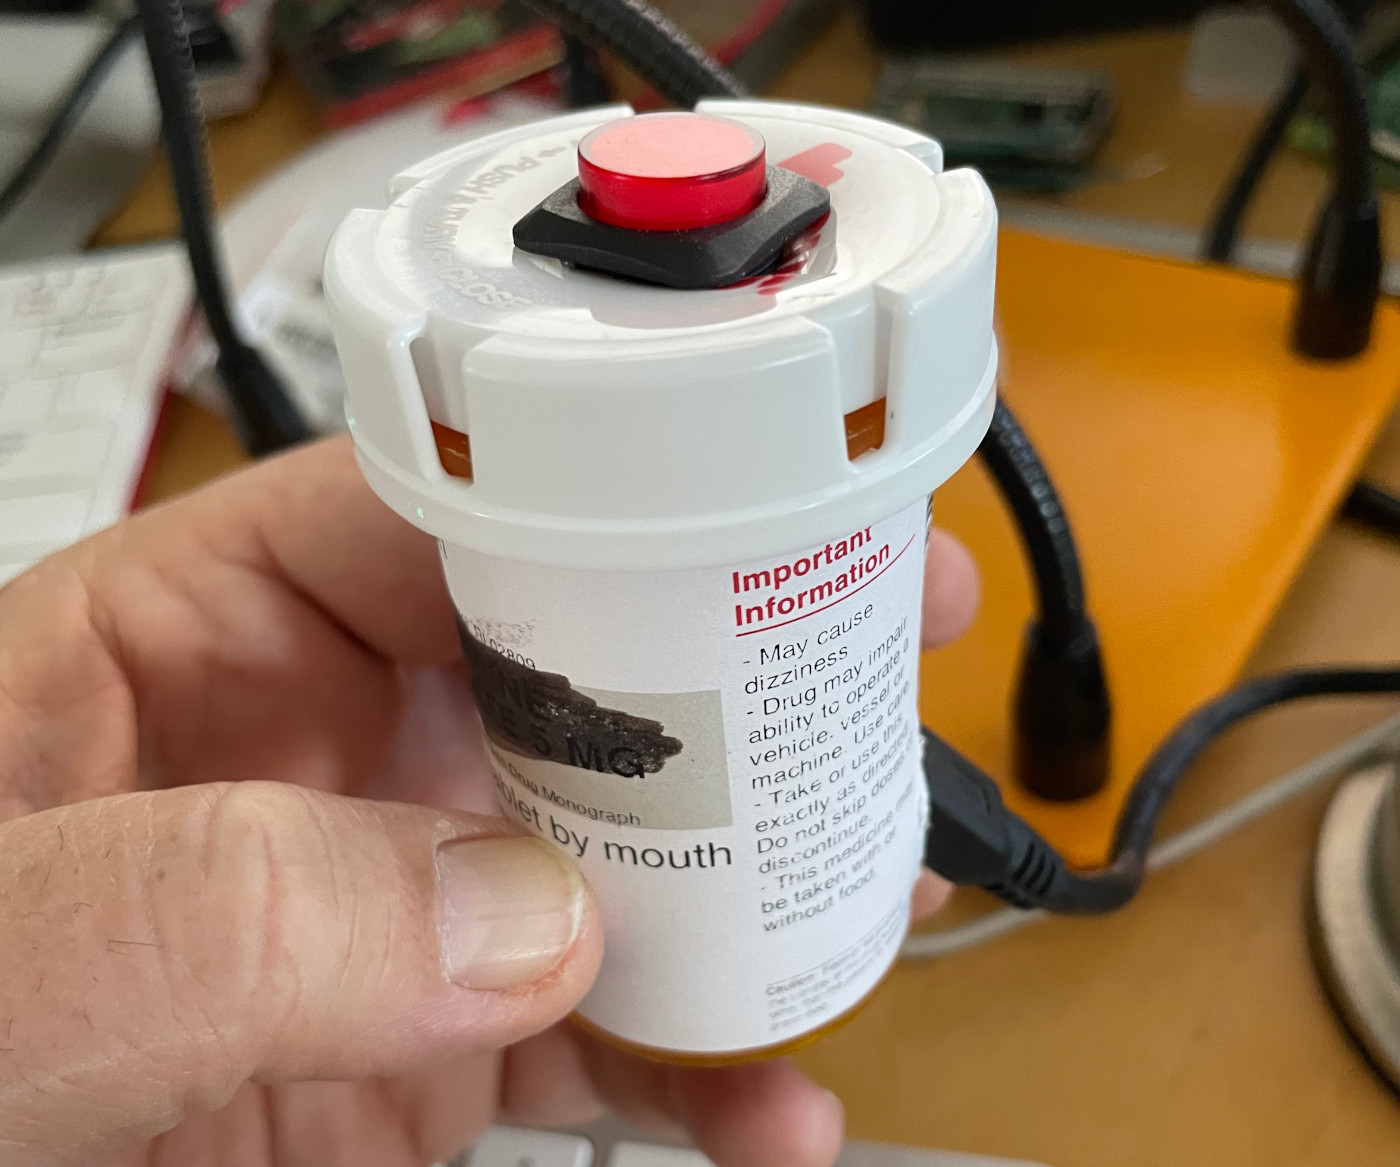
I purchased an Illuminated Red Momentary Pushbutton but couldn't find an enclosure to hold it and the Pi Pico. After looking around the house I found a pill bottle. While it appeared to be a good solution, it didn't work well. The Pi Pico and button fit well into the pill bottle and cap, but I didn't plan for the USB cable. As a result, the pill bottle wouldn't stand up. Despite my poor soldering job, Mouse Shake did work, lying on its side.


Raspberry Pi Gateway
While tinkering with the Raspberry Pi GPIO and physical programming over the past month, I discovered the "maker space" is large with many products and vendors. I found Adafruit while searching for a LED button.
Adafruit was founded in 2005 by MIT engineer, Limor "Ladyada" Fried. Her goal was to create the best place online for learning electronics and making the best-designed products for makers of all ages and skill levels."
Adafruit designs and sells boards and components. They have a large selection of microcontrollers of all sizes and capabilities. They are also an excellent resource for learning through their website content and YouTube channel. Sparkfun is the next company on my list to explore.
The Raspberry Pi Pico was my gateway to the larger microcontroller world.
Adafruit Neo Trinkey
Adafruit recently released the Neo Trinkey, a small USB board with two touch sensors, four RGB LEDs, and an ATSAMD21 microcontroller. The Trinkey caught my attention as a possible hardware solution for my Mouse Shake application. It's a perfect size and has enough power to handle the needs of Mouse Shake. At $6.95 it was worth a try.

CircuitPython supports both the Raspberry Pi Pico and Neo Trinkey, as well as two 198 other boards. With some minor changes, I expected the Mouse Shake program created for the Pi Pico would run on the Neo Trinkey. I needed to update the program to accommodate different components. Two touchpads replaced the switch, and four RGB LEDs replace the single LED.

Code Changes
The Mouse Shake code for Adafruit Neo Trinkey is available on Github. I started with the Pi Pico code and modified it for the Neo Trinkey
Pins
First step, find out which pins I have access to using the dir() command.
Neo Trinkey Pins: 3
import board
dir(board)
['NEOPIXEL', 'TOUCH1', 'TOUCH2']
Raspberry Pi Pico Pins: 30+
import board
dir(board)
['__class__', 'A0', 'A1', 'A2', 'A3', 'GP0', 'GP1', 'GP10', 'GP11', 'GP12', 'GP13', 'GP14', 'GP15', 'GP16', 'GP17', 'GP18', 'GP19', 'GP2', 'GP20', 'GP21', 'GP22', 'GP25', 'GP26', 'GP26_A0', 'GP27', 'GP27_A1', 'GP28', 'GP28_A2', 'GP3', 'GP4', 'GP5', 'GP6', 'GP7', 'GP8', 'GP9', 'LED', 'SMPS_MODE', 'VOLTAGE_MONITOR']
Touch Pads and RGB LEDs
As my first experience with conductive touch pads and RGB LED, I needed to learn how to use them in CircuitPython. With help from CircuitPython documentation, I wrote a program that activated the LEDs by touch. There are three touch points, Touch 1, Touch 2, and both at the same time. My test program lights up all four LEDs based on these patterns. Touch 1 - Red, Touch 2 - Blue, and both yellow. This test program for Neo Trinkey is available on Github.
Button to Touch Pad
The code below shows the different between using a button and touch pads with CircuitPython.
# Import library
import digitalio
...
button = digitalio.DigitalInOut(board.GP13)
button.switch_to_input(pull=digitalio.Pull.DOWN)
...
while True:
    # When button pushed
    if button.value:
Touch Pads:
# Import library
import touchio
...
# Initialize touch pad
touch_pad_1 = board.TOUCH1
touch_pad_2 = board.TOUCH2
touch1 = touchio.TouchIn(touch_pad_1)
touch2 = touchio.TouchIn(touch_pad_2)
...
while True:
    # When either pad is touched
    if touch1.value or touch2.value:
        active_state = not active_state
LED to RGB LEDs
The code below shows the difference between using LED and RGB LED with CircuitPython.
LED:
#Import library
import digitalio
...
#Initialize LED
led = digitalio.DigitalInOut(board.GP14)
led.direction = digitalio.Direction.OUTPUT
...
# Initial LED state
led.value = False
RGB LEDs:
# Import library
import neopixel
# Intialize LEDs
pixels = neopixel.NeoPixel(board.NEOPIXEL, 4,auto_write=True)
pixels.brightness = .1

RED = (255,0,0)
NONE = (0,0,0)
BLUE = (0,0,255)
YELLOW = (255,255,0)
Int vs Long Int
I had one problem moving Mouse Shake from the Pi Pico to Neo Trinkey. There was something wrong with the code, but Thonny, the Python IDE I was using, did not display a helpful error message. Then I tried running the code in MU, a different Python IDE, and found the error related to "long int type not supported".
A key difference between the Pi Pico and Neo Trinkey is the processor. Pi Pico has a RP2040 chip (32-bit Dual ARM Cortex-M0+ @ 133MHz), while the Neo Trinkey has a SAMD21 (32-bit Cortex M0+ @ 48 MHz ). The SAMD21 does not support Long Int data types, but it does support Int data types.
The time.time() function used to track elapsed time returns a Long Int data type; therefore, the line of code: active_time = time.time() failed execution on the Neo Trinkey. I discovered the time.monotonic() function returns a smaller integer and provides the same functionality. Updating the code to use time.monotonic()corrected the issue. According to the CircuitPython documentation, Long Int data types are not supported at all. More research is required by me to understand why Integers work differently between the two boards.
Mass Storage Device
When connecting a microcontroller running CurcuitPython to a USB port, the computer recognizes it as a mass storage device (USB drive). Having the board connected as a USB drive is helpful when programming because you can easily edit the code directly on the device. For my Mouse Shake project, I don't want the microcontroller recognized as a USB drive; it should be an input device only. While CircuitPython defaults "mass device storage" set on by default, it can be changed. This change requires rebuilding CircuitPython. It was surprisingly easy to do with the help from an Adafruit tutorial. The CircuitPython USB device defaults are also documented at AdaFruit.com.
In Conclusion
This was a fun and educational project. I'm happily using Mouse Shake daily on the Neo Trinkey. I plan to use the RGB LEDs more effectively:
- Active - All four LEDs solid blue
- 5% Active time remaining - All four LEDs solid yellow
- 1% Active time remaining - Circular motion of RED LEDs